Learn the Quick Steps for Annke Camera Setup
Generally, security cameras are one of the primary necessities in this modern era. Likewise, in the range of these modern surveillance devices, Annke cameras are also top-listed. Similarly, these are easy to access and available as wireless options. Additionally, for security enthusiasts, performing an Annke camera setup is a must first.
However, this is essential to make the most of your security device. Likewise, there are different ways to configure your security device, such as using the web browser and the app. Therefore, if you are seeking help with the complete annke camera wifi setup, then must stay tuned to this page. Here, you find detailed information regarding the setup and more, so keep reading!
Prerequisites for the annke camera setup
While you think of beginning with the configuration procedure of the Annke camera, then ensure to have the below-mentioned things with you:
Annke camera (charged completely)

Active internet connection

SADP Tool

Annke Vision app

Computer /smartphone

Ethernet cables
How setup Annke Camera by Using Different Means?
Moreover, the setup process is a necessity to use and customize the camera according to your preferences. Hence, when you get ready with the necessities for the configuration, then go ahead with the annke security camera setup. Further, you can opt for the software or the app method that you find easy.
In the below-given section, we share the detailed steps for each process to assist you with the camera setup. If you want to find more, then stay tuned here!
SADP Tool Software for Annke Camera Setup
- To begin with, power on your security cameras and link them to the existing internet.
- Next, connect the computer to the existing home network.
- Make sure you have the SADP Tool on your Windows system and a user account.
- Now, access your Annke camera by mentioning the admin details on the login window that appears to you.
- Keep in mind that the Annke cameras are viewed on the IE web browser as these do not have any other plugin that is compatible with any other browser.
- Afterward, tap on the link shown to you to download the web plug-in to view the cameras.
- Next, click on “Allow” and the plug-in starts to download.
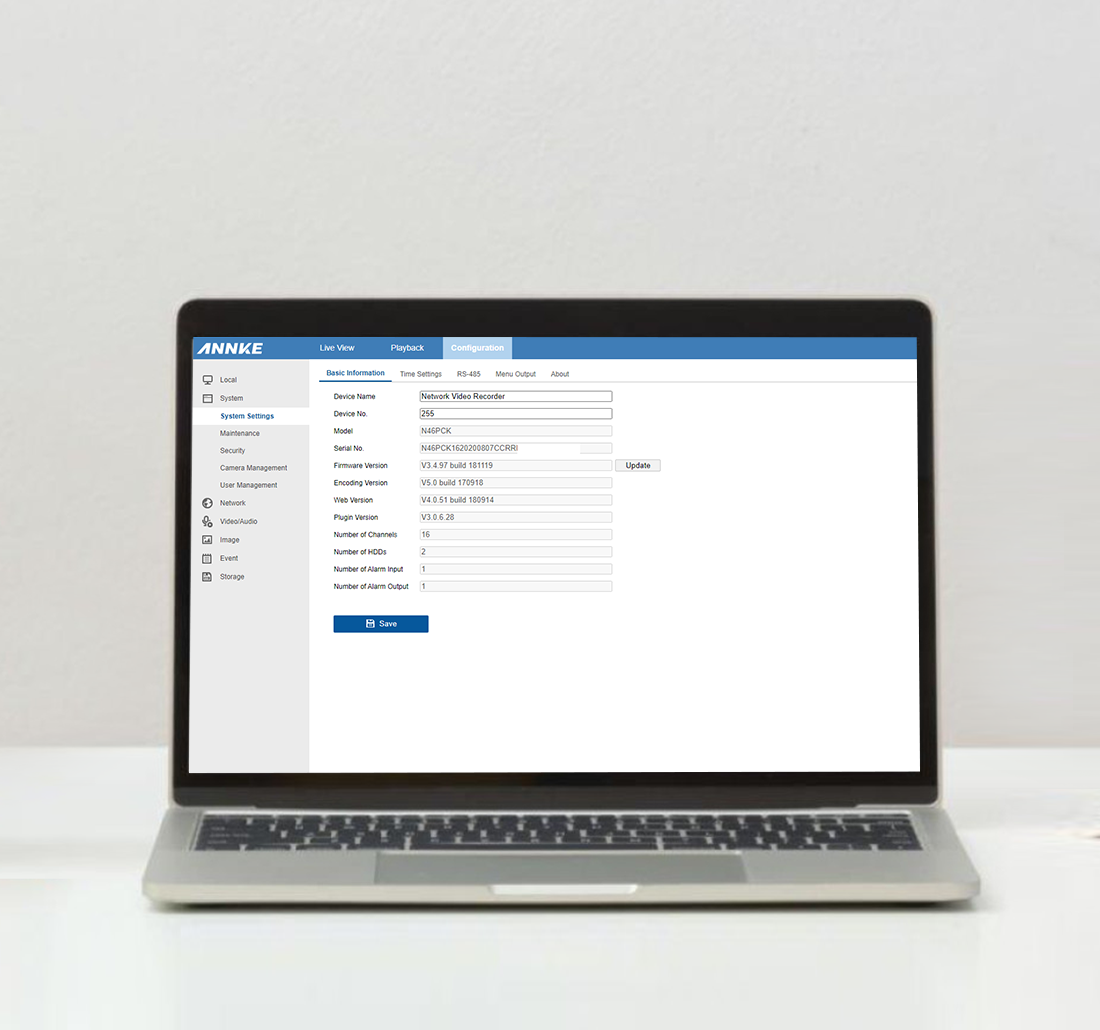
- Hereon, you can now view the cameras on the Web Browser with several options as Live View, Playback, and Configuration to configure the additional settings.
- At last, tap on Ok to apply the customized settings and you successfully end with the annke security camera setup.

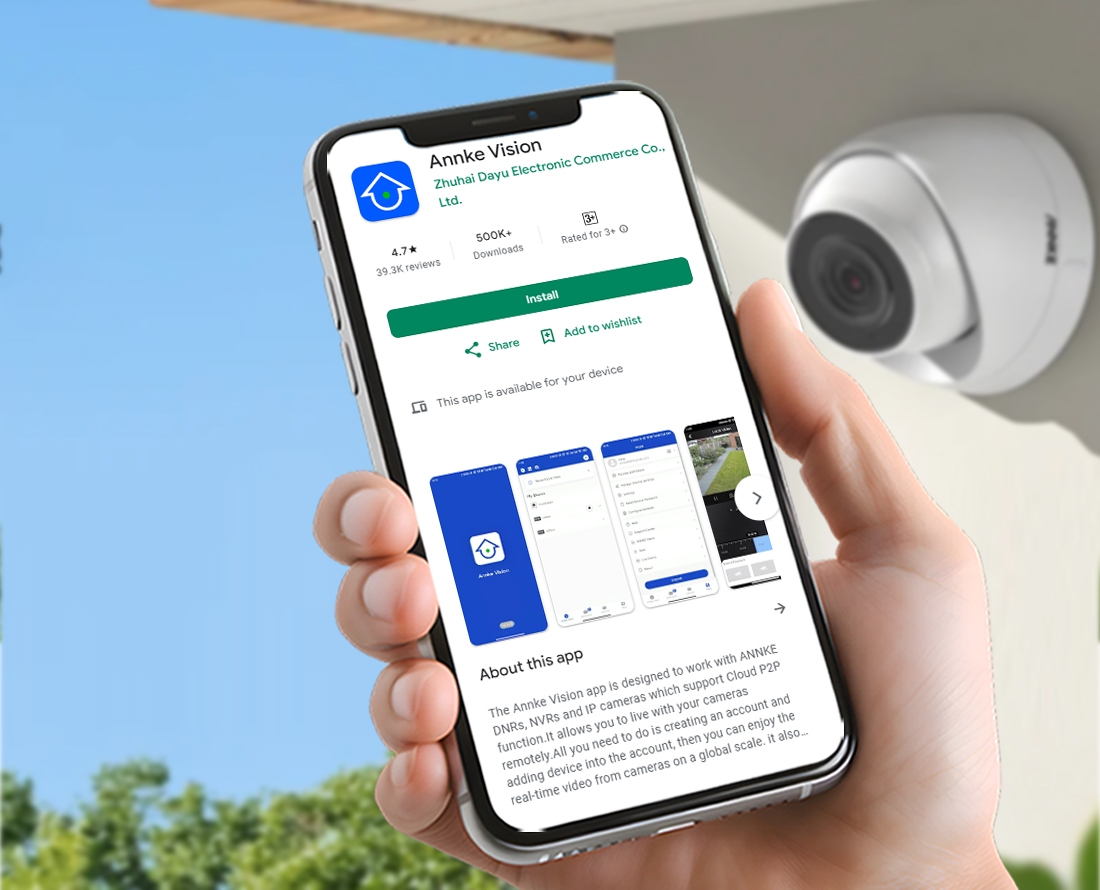
Camera Configuration via the Annke Vision App
- Initially, connect the smartphone to the home network.
- Afterward, access the Annke camera admin account by entering the valid username and password on the login window.
- Next, you land on the smart setup wizard of the camera.
- Here, select the specific area for your camera to view it as Front Door/Indoor for Home/Office.
- After that, you get several options here such as Settings/Configure Network/Pictures & Videos, and more.
- To configure the particular settings, select that option and follow the on-screen guidelines to complete the procedure.
- Here, you also get the Live Demo option and More option to explore your camera further.
- Finally, you are done with the hassle-free annke camera setup.
Explain the troubleshooting steps to fix the annke camera wifi setup issues.
Generally, the web interface of the Annke camera is quite easy and users can easily access it. Besides this, they face issues while accessing or configuring their surveillance device. However, the issues may arise due to incorrect admin details, unstable/no network, wrong IP address, not having SADP Tool, device compatibility, etc.
Furthermore, it is necessary to resolve these issues timely for the optimal performance of the cameras and an effortless camera configuration. So, take a look below:
- Initially, check that the camera is charged completely and connected devices have sufficient power supply.
- Ensure that you are using the compatible devices to use the SADP Tool and the app too.
- Check that you follow the correct guidelines for the annke camera setup and then save the settings.
- If you have issues with the wireless network, then use the ethernet cable to stabilize it.
- Remove the signal interferences, such as furniture, mirrors, EMW devices, and more.
- Make sure, you are using the accurate version of the SADP Tool as per the device you use, such as a Windows/Mac system.
- Reconfirm the IP address and admin details before mentioning them.
- Make sure the camera and the Windows/Mac/Smartphone are linked to the same router’s network.
- Check that you activate the SADP Tool on the Window first to get the valid camera IP address.
- Power cycle the camera to fix the technical glitches and bugs.
- Check that all the cable connections are joined properly and cords are not damaged.
- Place the cameras within the router’s network range and at a suitable distance from the ground.
- If still the issue persists, then factory reset Annke camera and reconfigure it from scratch.
How to proceed with the Annke Camera Firmware update?
Additionally, the Annke camera firmware update is necessary to keep your surveillance device upgraded and to add the latest features to it. Also, this will add an extra layer of security to the security cameras.
However, you can perform this process using the web GUI, with NVR, or through the app. But in this section, we highlight the detailed steps for the web browser method, so keep reading:
- First and foremost, ensure your surveillance device is powered on.
- Now, connect the Window system/Monitor to the existing home internet connection.
- Ensure the Annke camera is also linked to the same network.
- Now, access the web interface of the camera using the IP address from the SADP Tool and enter the valid admin details on the login window.
- After that, download the compatible and current firmware file on your computer.
- Next, navigate to the Configuration section and click on the System>Maintenance>Upgrade & Maintenance>Browse.
- Hereon, upload the firmware file you recently downloaded and stored on your Windows system.
- After that, click on the Upgrade, and the firmware update process begins here.
- Do not perform any activity or shut down your system until the firmware upgrade process ends.
- Further, wait till the procedure completes as it takes 2-10 minutes, and the camera will reboot itself after the firmware update.
- Lastly, you are done with the Annke camera firmware update procedure.